I care deeply about child passenger safety, and I want to share a simple, steady approach that helps me secure a child car seat properly. My priority is that every trip begins with a safe harness and a snug fit so my child rides protected in the vehicle.
I follow the manufacturer’s instructions and double-check the path of the belt and anchors. That habit has helped me avoid common errors and gain confidence when I install rear-facing and forward-facing systems.
In this guide I explain what I do step by step, how I verify a tight fit, and how I use both lower anchors and the belt when needed. My goal is to help you secure car seats in one car with care and patience so every child passenger stays safe on the road.
Preparing for Your Car Seat Installation
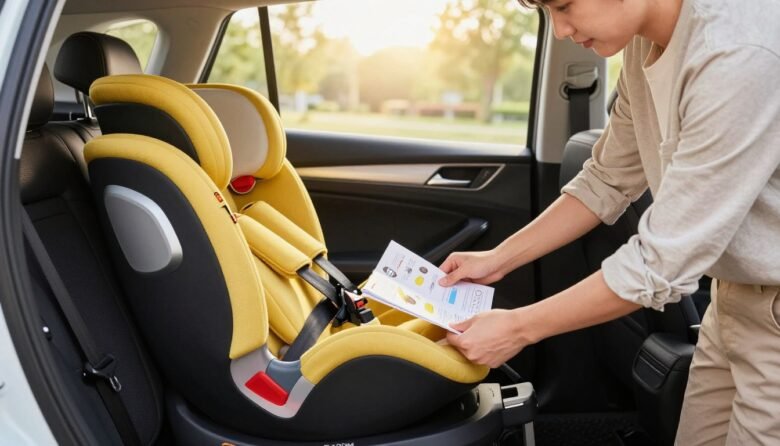
Before I touch any straps, I pause to gather the manuals and inspect the hardware so I know exactly what to follow. This small prep step saves time and reduces errors when I begin installing car seat systems.
Reading Your Vehicle and Seat Manuals
I read both the owner manual and the product manual every time. They list the correct weight height limits and the proper belt paths for the model I’m using.
- I confirm the child weight height ranges listed in each manual.
- I review guidance on using the vehicle belt or lower anchors.
- I check for model-specific notes like angle markers or leveling instructions.
Checking Car Seat Expiration Dates
It is vital to check the label for an expiration date. Most car seats expire six to ten years after manufacture.
I also make sure to use the angle indicator on my Chicco product and keep the bubble level within the lines shown in the manual. This ensures correct recline for the child passenger and helps meet the weight height guidelines.
Selecting the Safest Location in Your Vehicle
I always choose the back row because it is the safest place for my child to ride. The rear protects the head, neck, and spine best in a crash.
Before I mount a car seat, I check the owner manual and the vehicle seat markings to confirm which location allows a secure fit. That saves time and reduces guesswork.
- I pick the side closest to the sidewalk when parked on the street so my child exits away from traffic.
- I make sure the chosen seat does not block the driver’s space or the seat belt path.
- For rear-facing use, I check the angle and confirm the seat vehicle position gives a clear recline and bubble level per the manual.
Choosing the right place in the back row makes securing car seats easier and improves safety for every trip.
Essential Car Seat Installation Tips
I rely on a few go-to checks to ensure the harness holds steady before any drive. I start by confirming the chosen place in the back row gives a clear belt path and anchors that line up well.
Next I perform the inch test by pulling at the belt path. A properly installed car seat should not move more than one inch in any direction when I pull firmly.
I check side-to-side and front-to-back movement to confirm stability for my child. Whether I am installing rear-facing or forward-facing, I make sure to secure the lower anchors or the vehicle belt firmly.
- I verify the seat fits the vehicle and is the best place to keep my child safe during travel.
- When installing car seat equipment, I tighten until the base or shell is snug and shows minimal play.
- I test the fit in one car before using the system elsewhere to avoid surprises on the road.
Choosing Between Seat Belts and LATCH
Deciding whether to use the vehicle belt or LATCH starts with checking the child’s weight and the product manual. I verify the limits listed so I know when the lower anchors are approved and when I must switch to the vehicle belt.
Understanding LATCH Systems
LATCH stands for lower anchors and tethers for children. I use this method when the child is under the weight limit shown in the manual and the lower anchors align with the anchor points in my vehicle.
- LATCH gives a clear anchor point and often makes initial positioning easier.
- Do not use both lower anchors and a seat belt at the same time unless the manual allows it.
- Check the weight limit so I switch to the belt when required.
Using Vehicle Seat Belts
Some systems, like the Chicco OneFit LX, include a LeverLock self-tensioning lock system that helps secure the seat belt with minimal effort.
I always route the belt through the correct belt path and tighten until the base is snug. That final check ensures the child system is stable for the ride.
Mastering the Inch Test for a Secure Fit
A firm, practical inch test gives me confidence that the system will hold during sudden stops. I use this quick check as my final safety step before each trip.
Checking the Belt Path
I start by grabbing the car seat at the belt path and giving it a strong pull side to side and front to back. The goal is simple: it should not move more than one inch in any direction.
I inspect the routing to make sure the vehicle seat belt or lower anchors follow the path shown in the manual. Correct routing and tension reduce movement and keep the harness stable for my child.
- I confirm the angle indicator and bubble level show the proper recline for the child.
- I tighten the belt or LATCH so the base or shell shows minimal play.
- If there is more than an inch of movement, I re-check the belt path and anchor points and tighten again.
Transitioning to Forward Facing and Booster Seats
Moving from rear-facing to forward-facing feels like a milestone, but I treat it as a safety step, not a rush.
I follow the American Academy of Pediatrics guidance and keep my child rear-facing until they reach the weight or height limit shown in the manual. When that limit is reached, I switch to a forward-facing harness and always attach the top tether to the vehicle anchor to reduce forward movement in a crash.
Once my child outgrows the harness, I move to booster seats when they meet the typical benchmark: about 4 years old, 40 lbs, and 44 inches tall. A booster helps the seat belt sit correctly across the shoulder and lap, which lowers injury risk in a crash.
- I confirm the belt path and the top tether anchor in the vehicle before tightening.
- I check the vehicle seat belt fit on the child; the lap belt must lie low on the hips and the shoulder belt across the chest.
- I follow the product instructions and the vehicle manual to set angle and anchors correctly.
Finding Professional Assistance for Peace of Mind
Finding a trained expert to review my setup gives me real peace of mind before any trip. I visit SafeKids.org or NHTSA.gov to locate a certified child passenger safety technician (CPST) near my home.
A CPST checks harness routing, lower anchors, and the vehicle belt path. They confirm weight limits and the correct place for the system in one car. When I change from install rear-facing to forward-facing or to booster seats, I get their help to make sure I did it right.
- A CPST explains whether to use lower anchor or seat belt for a given weight.
- If I’m unsure about the safest place, a pro points out the best location and anchor.
- Professional checks reduce mistakes and boost my child passenger safety confidence.
Conclusion
I want every ride to start with confidence that my child is secured correctly. Proper car seat use is the most effective way to protect the head, neck, and spine in a crash.
Always perform the inch test and check the belt path before you drive. Keep your child in the right seat for their weight height limits so the harness and belts work as designed.
If you need more information, read the manuals or contact a certified child passenger safety technician. Following these steps makes the seats stable and gives me peace of mind on every trip.

Dad. Engineer. Survivor of the first year. I’m James Calloway, and my daughter Claire is the reason I started writing. When she was born, I went looking for honest content written for dads — not parenting manuals, not diaper commercials, not advice from people who seem to have forgotten how hard the first year actually is. I didn’t find much. So I wrote it myself. The Dad Year is everything I wish someone had told me before that first night home. No expertise, no credentials — just a dad who took notes.